My First Meal

Previously on “Dana Tries Pot”

  • I tried unsuccessfully to hard-boil some eggs.
  • I finally figured out how to make the thing turn on and cook something.
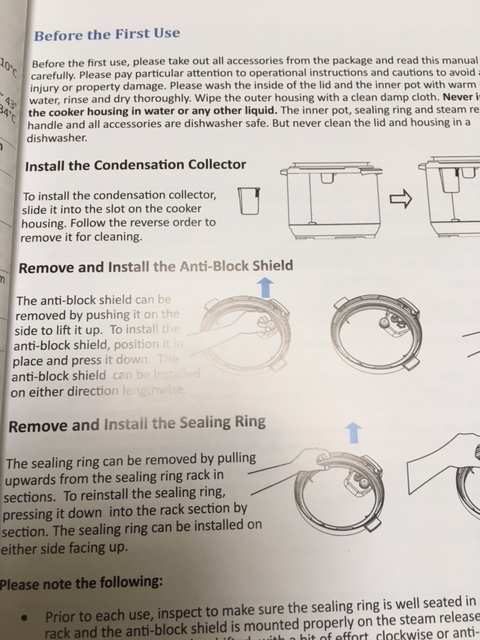
  • I am humbled and fully convinced of my need to read instructions (and sometimes to watch Youtube videos).

The Recipe

Since it’s Super Bowl weekend, I wanted to make something for the game tomorrow. Buffalo wings are pretty traditional fare for the Super Bowl, but hubbs doesn’t like wings much. So I found a recipe called Instant Pot Buffalo Chicken Chili and thought that might be both easy and a Super Bowl-ish compromise.

You can see the original recipe in the link, and here’s how I did mine “to taste”:

Ingredients

cooking spray

1 c. carrots, peeled and sliced

1 c. celery, chopped

about 3/4 c. chopped onion

2 cloves minced garlic

1.5 lbs ground chicken

2 15-oz cans diced tomatoes

2 1/2 teaspoons chili powder

1/3 c. hot buffalo wing sauce (I used a bottled brand called Wing Time)

1/2 c plain Greek yogurt

1/3 c goat cheese crumbles (because I hate blue cheese)

chopped chives for garnish

Directions

  1. Spray the inside of the Instant Pot with cooking spray.
  2. Put in the ground chicken and turn the Pot to Saute. Saute with the lid off, stirring, until the chicken is lightly browned.
  3. Add the onion and stir with the chicken for about 2 minutes.
  4. Add the carrots, celery, and garlic and stir. Switch the pot to “keep warm.”
  5. Put the diced tomatoes into a blender. Pulse briefly so that the tomatoes are the consistency of chunky tomato juice. Two cans yields a little over 3 c. of liquid.
  6. Add the tomatoes, chili powder, hot sauce, and garlic to the chicken and vegetable mixture and stir in.
  7. Lock the lid in place and turn the venting valve into sealing position.
  8. Using the Manual button, set the timer for 25 minutes. It will take an extra ten minutes or so for the pot to come to pressure. You will hear steam happening once the pressure cooking begins.
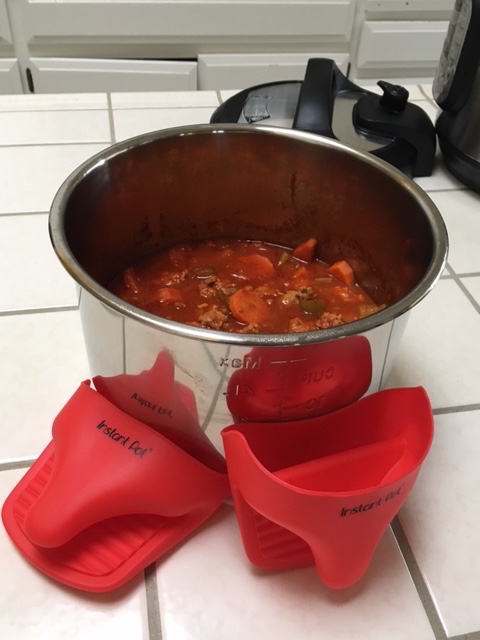
  9. When the timer goes off, release the pressure using quick release. (Turn the venting valve to “venting,” but be careful because hot steam will escape from the lid. I used silicone oven mitts and kept my arms, face, etc. at a safe distance.)  It took maybe 10 minutes for the pressure to release.  Then I turned the pot off (it will default to “keep warm”) because we’re not eating the stuff until tomorrow.
  10. Top with the cheese crumbles mixed into the Greek yogurt, plus chopped chives for garnish.

After 25 minutes, the veggies are tender and the meat appears properly cooked. I tasted it briefly, and it’s HOT. I think we’ll like that Greek yogurt mix-in when the time comes.

finished-chili

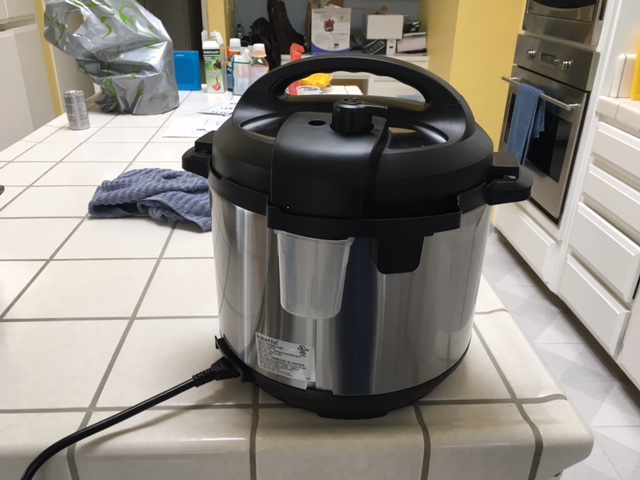
So…it’s done. The thing is out of the box, it’s assembled, and it cooked me something!  Hurray!

EDIT: Reheated the chili today using the slow cooker function on the Instant Pot. We ate it during the Super Bowl. It was really good!  My tweaks gave it the right amount of heat, especially with the yogurt/cheese crumbles sauce stirred into individual servings. I thought the amount of liquid was about right, but I could see going with even a bit less, say 2-2 1/2 cups, for a thicker sauce.

I’d eat this again. I like making chili and have a few recipes in my rotation, but I think this one is worthy.


I’m an Idiot

Seriously, an idiot.  Who knew that the “Timer” button wasn’t meant to set the cooking time (like on my microwave, my oven, etc.)?  It’s for setting the timer in advance for delayed cooking (like on my coffeemaker).  I get it now!

So the Manual button is my new best friend. THAT’s how I tell the thing how long it should cook. When I did that, the pot beeped three times and displayed a very reassuring “ON” message on the screen.  And it’s making noises, like there’s steam escaping. Pressure cooking, ya know.

So I have something cooking in the pot now.  It’s this recipe for buffalo chicken chili.  We’ll see if it actually cooks this time!

Putting All My Eggs in One Basket

I thought the easiest thing to start with would be hard-boiled eggs. I love them, for one thing, and it made sense to try something really basic for my first attempt. Plus I found this article, which listed eggs as one of “the first seven things to make with your new Instant Pot.”

I have learned some things about myself today.  First, I’m really impatient and should read instructions.  I didn’t know, for example, that after pushing a function button, you have only 10 seconds to adjust the timer.  I couldn’t figure out how to get the $*&% thing going and had to resort to…well…reading the manual.

Then I thought I’d followed instructions. I put four eggs , which I’d gotten to room temperature per suggestions I’d read in the Instant Pot Facebook Community page,into the steaming basket that came with the pot. I added a cup of water, per instructions. I put it on the manual setting and set it for five minutes (as the “first seven things”) article specified.

Then I waited and…nothing happened. The second thing I learned about myself is that I’m not very intuitive and my instincts are nearly always wrong.  The “first seven things” article said “Close the pot” (check), “close the vent valve…” and…um. I didn’t know which way to close the vent valve, which is on the top of the pot. There’s a setting for venting and a setting for sealing.  Since it said “close the vent valve,” I assumed that meant “turn the valve to venting.”  WRONG.  Again, reading the (not very clear) manual made this more apparent.

Now I’m on Round 2 with the eggs. The valve is set to “sealing.”  It beeped three times after I set the timer for five minutes.

And…I realized that I set the timer for five hours, but it wasn’t doing anything anyway. I canceled the job, and now I think I’ve killed it. It won’t turn on at all!

EDIT:  OK, haha.  It’s not dead. I just managed to knock the power cord loose in all my flailing around with the lid.  I gave up on the eggs and have moved onto my Super Bowl chili.  See next post.

So far I seem to be better at blogging than the Instant Pot. WordPress is pretty easy to use!

Stay tuned…


OK, It’s Out of the Box

The day after I wrote my first post, I came down with a virus. Yes, That One. I was sick in bed for more than a week and dragging around for the next week. It was also the very beginning of winter quarter, so I was sick AND busy. And the weather was awful.

You get the picture. There was practically no cooking whatsoever of any description in the month of January, and there was certainly no mental space for a new cooking toy.  But now it’s the first weekend of February, and it’s time to get this party started.  Tomorrow’s Super Bowl Sunday, and I thought it would be fun to try something in the Instant Pot for the game.

Setting it Up

I’d found a link to a Youtube video called Instant Pot Unboxing & Assembly.  I watched the first 30 seconds of it and rolled my eyes:  She actually demonstrated how to use a box knife and how to open the box.  I can handle this on my own, I thought. There’s a manual, I can read, and I certainly know how to take things out of boxes without watching a (seven-minute!) video.

Well…I was right.  Sort of.  I got the stuff out of the box, got rid of the plastic wrap and cardboard inserts.  Not rocket science.  So the “unboxing” thing was done.  I gleefully took photos of the different components as I unearthed them.

The manual had steps for how to get the thing up and running.  Wash and dry the inside liner bowl and the inside of the lid, using warm, soapy water. Check.

Then I hit a snag.  “Install the Condensation Collector,” it said.  I was able to figure out what that was–it’s a little plastic cup thingy–kind of oval-shaped, not to be confused with the rice cup that comes with  it (that’s a normally shaped rice cup).  But the manual’s cryptic directions: “slide it into the slot on the cooker housing” and very generic drawing were not self-explanatory enough for me. (I should say that I’m hopelessly challenged when it comes to using diagrams to accomplish things. I’m a verbal person.)

incomprehensible-instructions

After a few minutes of having no idea whatsoever where to install this thing, I…gave up and watched the Youtube video.  And it helped!  Not only did I understand where to put the condensation collector, but as a bonus, she explained that there’s invisible plastic over the control panel on the front that has to be peeled off.  Done!  I also went back to it to watch how to put the lid on properly.

condensation-collector-installed

So…it’s out and it’s assembled.  So far, so good.  Now it’s time to cook something!

Eyeing My Instant Pot

I wanted an Instant Pot™ for Christmas. I put it on my Amazon wish list.  Why?  Partly because I have an insatiable appetite for new kitchen gadgets (Ma’am, I’m going to need you to step AWAY from the Williams-Sonoma website with your HANDS UP) and partly because some friends and co-workers were raving about it on Facebook.

I like to cook and I love my slow cooker, but some days my schedule doesn’t lend itself to such advance planning and preparation. The lure of a device that could deliver a delicious and healthy meal in minutes (sorry, Microwave, you don’t qualify) was pretty irresistible.

Anyway. I got my desired Christmas gift. That was almost three weeks ago, and it’s still in the box. I was recovering from dental surgery, dealing with Christmas, and then on vacation. No time to play with a new toy.

But I’m…preparing. My first move was to announce my acquisition on Facebook and ask for ideas from IP veterans.  They obliged with links and by adding me to their Facebook groups. Since then I’ve been collecting links and recipes, just adding them to my Favorites on my iPad Safari browser.  I’m up to about 15 links, climbing daily. Lots of great advice, and I can tell I’m going to lose track of it all quickly if I don’t find a way to organize myself.  Thus, this blog–an ongoing record of what I do, what I cook, and things I find. I may just be doing this for myself, but who knows–it may help someone else, too.

I also used an Amazon gift card to start accessorizing my IP–an extra stainless bowl, a lid, extra sealing rings, cute little red mini-mitts, a steamer insert. I can see from my reading so far that there may be many more ways to add on. But I think I’m good for starters.

So…it’s still in the box. But it’s accessorized. And my ideas file is growing. And now I have a blog!

It will come out of the box either tomorrow or next weekend. Watch this space!