“Life-Changing”?–Eh, Not So Much (Beef Stew)

I poked fun at the title of this recipe a few days ago on Facebook, but the truth was that I was already planning to make it.

I wouldn’t call it “life-changing,” but it certainly was easy.  And it turned out OK, not great, but part of that was my fault.

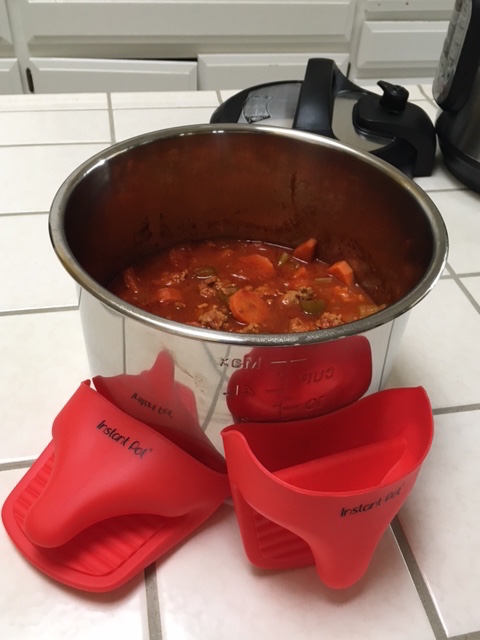
I didn’t thaw the stew beef first, and I was curious to see how the meat would do if I used the normal meat/stew setting (35 minutes after coming to pressure).  The answer was “not great.”  The meat was tough, though it was cooked on the inside. The veggies were perfect. The recipe suggested finishing the dish in the oven (I did 18 minutes at 375 degrees). I also threw in some leftover roasted potatoes I had from another meal (during the oven-finishing phase). I don’t think the potatoes changed the outcome at all, either way.

I wasn’t happy with the texture of the meat, and the sauce/gravy was just OK. It was a bit sweet, I guess from the sugar and tapioca. I could have used a bit more kick from garlic or cayenne or some herb mixture.

Overall I don’t think I’d make this again. I might try another beef stew recipe that looks better to me, or I might just stick with the slow cooker for stews.

A Whole Meal in the IP: Baja Pork Stew, Jasmine Rice, and Broccoli Florets

I haven’t gotten up the nerve to try cooking two dishes at the same time in the IP (veterans on Facebook call it PiP or Pot-in-Pot). But for last night’s dinner I staged the meal and cooked all three dishes in the IP, serving it up by 6 p.m.!

Step 1:  Veggies (Broccoli Florets)

I had some broccoli florets from Trader Joe’s that I needed to cook up.  I did it thusly, following advice from this site:

  • 1 1/2 cups of water into the IP
  • insert steamer basket
  • Put broccoli into the steamer basket
  • Lock and seal lid; push Steam button and set timer for 3 minutes
  • Quick release when done.

I tossed the broccoli with some melted butter, garlic salt, and pepper, covered the dish and put it aside, and quickly rewarmed it in the microwave when it was time to serve dinner. I thought it was delicious. Same exact instructions for cauliflower florets, I take it.

Step 2: Jasmine Rice

I frequently cheat and buy microwavable frozen jasmine rice packets from Trader Joe’s, but I decided to try to make it myself. I looked up a bunch of different sites on this, and here’s what I did:

  • 2 cups of water in the IP
  • 2 cups* of jasmine rice, rinsed and then into the IP with the water
  • Cook on Manual setting (high pressure) for 6 minutes**
  • Natural release for ten minutes, then quick release
  • Fluff rice with a fork

*I wanted extra rice for my leftovers (butter chicken and bourbon chicken, as well as my main course). For just one meal I’d stick with one cup rice and 1 cup water and reduce the time to 4-5 minutes.

**I actually cooked it for 5 minutes, but some of my rice was a bit hard and undercooked. With two cups of rice, I’ll try six minutes next time.

Step 3: Main Course (Baja Pork Loin Stew)

I used this recipe.  The original blog post is a bit to wade through, so here’s what I did.

  1. In a bowl, mix 3/4 c. chili sauce, 2 T spicy brown mustard (Gulden’s), 2 T Worcestershire sauce, and 1 T maple syrup.
  2. Cube a boneless pork loin (mine was around 1.4 lbs; the recipe calls for 1-2 lbs) and put it in the sauce to marinate, stirring to coat the cubed meat.  Cover the bowl and put it into the refrigerator. The recipe says to marinate it for at least 30 minutes; I actually left it in there for several hours, and it turned out great.
  3. Heat 1 T olive oil in the IP on Saute. Then I added diced onion (supposed to be 1.5 cups for one large onion) and sauteed it, stirring, for a couple minutes (2-3 min., per the recipe).
  4. Add peppers. I used 1.5 c. of the diced frozen pepper strips from Trader Joe’s and a fresh habanero pepper, which I seeded and chopped. (The recipe also calls for two chipotle peppers, diced, and 1 T adobe sauce. I misread and forgot the chipotle peppers. I’d use them next time, but it turned out great without them.)  Saute the peppers for a couple more minutes.
  5. Peel a large sweet potato and slice off four thin slices. Cube the rest and put the cubes aside.  Add the four sweet potato slices to the peppers and onions along with 1/2 c. water; stir everything up.
  6. Remove the cubed pork from the marinade and put into the IP on top of the peppers and onions mixture. (The recipe says “do not stir.”)
  7. Close and seal the IP; cook for 8 minutes (Manual, high pressure). Then quick release the pressure.
  8. Open the IP and add the cubed sweet potatoes. Add a bit of salt and pepper (about 1/8 tsp each).
  9. Cook on high pressure for 5 more minutes and then quick release again.

I served the pork stew over rice; the recipe suggests egg noodles. I like rice better, and I thought the jasmine rice flavor paired well with the sweet/spicy pork stew.

I thought this meal was great. The pork stew was delicious and not that hard to make. The broccoli turned out perfect.

Catching Up on 4-20 Day

It’s been awhile since I’ve blogged, but I’ve been using my Instant Pot almost constantly–well, between trips, anyway.  I went on five out-of-state trips in 29 days, from March 10 to April 8.  In some instances, I was home between trips for only 1-2 days. But after the first trip or two, I was sick of eating restaurants and wanted home-cooked meals, so every time I was home, I’d run to the store, buy the ingredients for several IP meals, and cook up a storm. I figured my husband would have something to eat while I was gone and I’d have something home-cooked even the first night I was back.

Anyway, with so much time having passed and so much rapid-fire cooking, I may miss a couple of recipes I’ve made, but I’ll summarize both some hits and some misses.

Ones I/We Really Liked

  1. Chipotle Chicken:  This goes first because it was so ridiculously easy.  I threw 1.5 lbs of boneless, skinless chicken thighs into the IP and 16 oz. of salsa from a jar. I just seasoned the chicken with a bit of salt and pepper before pouring the salsa over it, but I’ve seen other recipes that suggest a packet of taco seasoning. I mixed two different flavors. (Hubbs thought it was a bit too hot, so I’ll be sure to stick strictly to mild salsas next time.)  I cooked it for 13 minutes on high, followed by a quick release. I let it cool for two minutes, and shredded the chicken. I served it over rice with guacamole, cheese, and more salsa as taco bowls. I thought it was great, and SO EASY.  I might kick it up next time with some diced fresh tomatoes or cilantro, and some black or refried beans in the taco bowls would be good, too. It would work fine in tortillas.
  2. Pulled Pork:  I love pulled pork and often order it in restaurants. I rarely try to make it myself. This recipe was really good, I thought.  It takes a bit longer (1 hour in the IP plus a 20-25 min. natural release), but it was quick and easy to get into the IP and then to finish. I served it on hamburger buns with coleslaw on top and we both thought it was really tasty.
  3. Butter Chicken:  I’ve shared my previous success with Chicken Tikka Masala and how I love to make Indian food at home because it’s not safe for me to eat it in restaurants due to a severe food allergy (sesame) and the risk of cross-contamination.  Anyway, this recipe has been wildly popular on my favorite Facebook group (Instant Pot Community), so I thought I’d try it.  The recipe suggests using minimal chicken (only around a pound) and saving the extra sauce for something else later. I decided the heck with that and used 1.5 lbs, and I think next time I’d use 2-2.5 lbs.  You cook the chicken thighs whole and can either serve them that way or cut them up into smaller bites later. (I might try that first next time. It worked fine for my Chicken Tikka, using the poultry button on the IP.)  The only problem I had with the recipe was that it was oddly written such that the salt was listed after the chicken, so I missed it until I was already pressure cooking.  Hubbs: “It’s good, but it tastes like it could use salt.”  Also, the recipe calls for a full teaspoon of cayenne pepper. I like things hot, but it could be cut back to a 1/2 tsp. or even less if someone doesn’t share my love for heat.
  4. Red Beans, Sausage, and Rice:  The IP is supposedly really good at quickly cooking dried beans without needing to soak them for hours, so I thought I’d try this one.  This again is not a super-quick recipe, but we thought it was really tasty. It makes a ton. I just cooked rice to go with it every time we wanted to eat more of it.

Meh–Wouldn’t Make Again

1. Easiest Ever Orange Chicken:  This is actually a slow cooker recipe that I adapted for the IP (used the Poultry setting).  It certainly is easy, with just a handful of ingredients, but I didn’t think it turned out that great. The sauce was watery. I’ll stick to my tried-and-true Panda Express Orange Chicken bottled sauce and cook the chicken either in the oven or the IP.

2. Curry Chicken with Potatoes:  Again, I thought the sauce was too watery and found it a bit bland. Won’t make again.

Jury’s Out

I also made Bourbon Chicken.  I think my husband must have liked it because I made it between trips 3 and 4 and it was gone by the time I got home. I have it on the menu again this week and will give it my own assessment.

P.S.–Ribs

I wrote most of this blog post last night while cooking my first batch of IP ribs (baby back). The Facebook group raves about what a great job the IP does with ribs.  I combined a couple of different recipes.  I made a dry rub from Epicurious, and let the ribs (one rack) sit on baking sheet in the fridge for half an hour. Then I put the ribs in the IP with 1 c. cabernet sauvignon (I used Two-Buck Chuck) and about half a bottle of BBQ sauce (I used a yummy honey-bourbon sauce).  30 minutes on high with a natural release (about 25 min.), then baste with more BBQ sauce and broil for 3 minutes.

The taste was good, but we agreed the ribs cooked have been cooked a little longer. They weren’t “fall-off-the-bone” tender–I know ribs purists think they shouldn’t be, anyway–but they took a little more work to eat than we wanted.  I think I’d probably do everything the same but add 3-5 minutes to the IP time. They were maybe still a bit frozen, too.

So that’s it from 4/20 Day (now 4/21)!


Finally! Hard-Boiled Eggs

The first thing I tried in my Instant Pot was hard-boiled eggs (see my two posts in early February), and they were both a #Fail.  I went on to cook a number of other things successfully in the IP, but I hadn’t tried this basic staple again.  Too cowed, I guess.

I finally got it: Perfect eggs, easy to peel:

  1. 1 cup of water in the bottom of the IP
  2. Eggs in a steamer in the IP:  I cooked four because, given my previous failures, I didn’t want to waste too many eggs.  I used the steamer that came with the IP, but any steamer would do.  I did not bring the eggs to room temperature first. Straight out of the fridge.
  3. Closed the lid, sealed the vent, set the IP for six minutes on Manual (high pressure, which it defaults to).
  4. Did a natural release for five minutes, then a quick release of the rest of the pressure.
  5. Took the eggs out with tongs and submerged them in an ice water bath (medium bowl, ice cubes, 2-3 c. cold water).
  6. Set the timer for 6 min., but I was busy moving a load of laundry, so they probably were in the bat for 7-8 min.
  7. Tested an egg by cracking the shell with a kitchen knife. The shell came off easily and the egg was perfectly cooked. I ate it to make sure(!) and put the rest of the cooked eggs in a bowl in the fridge for later.

Success!  I don’t like not being able to figure things out, and I DO like hard-boiled eggs–a lot.

I read so many different pieces of advice for how to do this, but the above timing came from a recipe on AllRecipes.com–actually from a reader comment, not the original. (And I used just 1 c. of water, not 2.)

Shrimp Risotto

I’ve heard that the IP is fabulous for risotto, which I love. To try it out, I used a recipe I’d saved on Facebook (from a blog): 5-minute Shrimp Scampi Paella Risotto.  Love shrimp, love paella, love risotto.

I followed the recipe as written, including the writer’s strong recommendation to leave the shrimp in the shells while cooking, to get the flavors into the risotto.  The risotto part turned out great. I didn’t love the shrimp. For one thing, my husband hates peeling shrimp, so I peeled all of them after cooking, and since they were piping hot, this delayed getting dinner on the table and was messy and tedious. But I peeled them and put the shrimp back into the risotto.  I also found the shrimp a bit rubbery and bland.

I definitely will keep making risotto recipes in the IP. This turned out perfect. But I’m not sure about the shrimp–might be better to make it separately and mix it into the risotto at the end.

More from Laurel Randolph’s Book: Oatmeal & Fried Rice!

In my last post, I mentioned The Instant Pot Electric Pressure Cooker Cookbook by Laurel Randolph. I made two more recipes out of it over the last week.  Again, I’m not typing out exact recipes out of respect for her copyright.

Steel-Cut Oatmeal

I decided to try oatmeal (which I adore and eat almost daily in the winter), using the Apple and Cinnamon Oatmeal recipe on p. 22.  It included steel-cut oats, chopped up and peeled fresh apple, cinnamon, and a bit of brown sugar. It cooked for 7 minutes–Manual setting–and then a 10-minute natural release.

I thought it tasted fine, though I found myself adding more brown sugar for topping–I wanted it a little sweeter.  It took a long time, though, and I’m not a big breakfast person, so I don’t know that I’d go to the trouble very often. Hubbs had a bowl, and I had a generous serving as leftovers a couple days later. I actually enjoyed it a bit more as leftovers.  So it was fine and the recipe worked perfectly, but I just don’t know that I loved it.

Fried Rice!

A few days ago, I made Faster-Than-Fast-Food Fried Rice (p. 63), to accompany orange-flavored chicken I was doing in the oven. A bit of background: I’m allergic to sesame and never eat at an Asian restaurant. This was an adult-onset allergy (mid-30s), and before that, we adored eating Chinese food. I loved the Panda Express Orange-Flavored Chicken, but I had a horrible allergic reaction from eating there. But I discovered that you can buy the orange sauce, bottled, at the checkstand there, and the sauce doesn’t have sesame. I found a recipe for Baked Orange Chicken, which I follow except that I use the Panda sauce instead of making my own. I’ve made this a number of times with great success.

I decided it would be fun to have fried rice to go with my orange chicken.  This recipe turned out great. Not much to it–white rice, water, salt, scallions/green onions, 2 eggs, and soy sauce.  You cook the rice, then push the steamed rice up the sides of the pot, leaving space at the bottom to cook the scallions and eggs on Saute.  You scramble the eggs and mix everything together and then throw in the soy sauce.

I thought it was great, and with the orange chicken, I really felt like I was eating Chinese food again.  The only downside was that the stuff stuck like crazy to the bottom of the pot and was a pain to clean. On a related note, I just found out from one of my IP Facebook groups that there’s a nonstick ceramic liner pot you can order. I ordered mine from the Instant Pot site (the Amazon site is severely back-ordered), and it should be here shortly ($29.95 with free shipping). This will be great for stickier stuff like the fried rice.

So I still think this cookbook is great, even if I didn’t love the oatmeal and my husband had to apply elbow grease to clean up after the fried rice. The recipes work perfectly so far.

P.S. I think I’m also going to experiment with making the orange chicken in the IP instead of the oven. I’d think the settings would be similar to the chicken tikka I made before.


Scrumptious Soup & Sides!

The Book

When I got my Instant Pot, the first thing I did was go on Amazon and order this book, Laurel Randolph’s best-seller, The Instant Pot(R) Electric Pressure Cookbook.  This week I dug into it and have tried three of the recipes, all with great success. Out of respect for copyright, I’m not going to retype the exact recipes, but I’ll make a couple of general comments.

Squash & Sausage Soup

This is a recipe that calls for butternut squash (4 cups of it) and about 3/4 of a pound of bulk sausage (I used mild Italian), plus other stuff (celery, onion, garlic, broth, and cream). What really puts it over the top is step one, in which you saute fresh sage leaves in olive oil (using the Saute function on the pot), fish them out and let them drain, and then crumble them over the bowls of soup to serve.

The sausage is then sauteed and removed.  Then the celery, onion, and garlic get a whirl on Saute. The squash and broth are added, and then the pot goes on Manual (high pressure, 15 minutes, quick release).  Add the cream and then use an immersion blender to puree the soup.  Add back the sausage, serve the soup, and crumble the sage on top.  Absolutely delicious.

The recipe was pretty much perfect, and my husband really liked it, too. He said he doesn’t usually like butternut squash soup because it’s too sweet; this was savory. For the future, I might add a bit more sausage (I was wishing for more) and I’ll remember that I seasoned with 1/2 t kosher salt and a few grinds of pepper before the pressure cooking and again before serving.   Big success, and I’m eating a bowl of leftover soup for lunch today. (I’d say it makes four generous main-dish servings or maybe six first-course servings.)

Sides: Fingerling Potatoes and Spicy Carrots

I made both of these to accompany a skillet sloppy joes dinner.  The potatoes were easy (small fingerling potatoes, salt, butter, pepper). You brown them and crisp them a bit on the Saute function in butter (about ten minutes). They cooked 7 minutes on Manual/high pressure and then a 10-minute natural release.  So this is not really a last-minute side dish, but still quicker than oven-roasting..  They came out fine and tasted good.

The carrots were amazing. The biggest time eater is peeling and slicing the carrots, and you could probably dispense with that by simply using peeled baby carrots instead. They cooked for 2 minutes (!!) in a steamer basket on Steam/high pressure, then a quick release, and then, after draining the carrots, they’re sauteed with butter, cumin, cayenne, salt and pepper, and honey.  They were cooked perfectly and the seasonings were delicious. My husband called them “Mexican carrots.”  This one was a real keeper.

I’m a happy Instant Pot camper this week, and the book so far is a hit. I plan to try a lot more recipes from it.  It’s currently under $10 on Amazon, so I’d grab if you have an IP or another electric pressure cooker.


Instant Pot Chicken Tikka FTW!

I was going to make chicken tikka masala in the slow cooker today.  I love Indian food, but I can’t eat in Indian restaurants anymore due to my severe sesame allergy.  I’ve tried several chicken tikka recipes at home and even ordered garam masala and tandoori masala from Amazon so that I could make it and other recipes.

I had my day planned: I was going to get the ingredients together starting at 10:30 a.m., so I could have the slow cooker going by 11:00.  The slow cooker recipe calls for 6-8 hours on low plus a final 30 minutes to add cream and cilantro and lemon and thicken, and I’ve learned that if I don’t go on the low end of my slow cooker ranges, it turns my chicken breast into leather.

So…my house cleaners showed up at 10:20. (I never know exactly when to expect them. Sometimes it’s Wednesday, not Tuesday.) No slow cooker prep for me today.

Got home from work around 3:30 and decided not to give up on my chicken tikka. I’d read an article about how to convert slow cooker recipes to the Instant Pot, and then I looked up specific recipes for chicken tikka for the IP.  I had a plan.

Here’s what I did:  I prepped the ingredients, using my favorite slow cooker chicken tikka recipe.  Didn’t change a thing. Then I put everything into the Instant Pot, locked the lid and sealed it, and pushed the “poultry” button.  When time was up (about 10 minutes to come to pressure and 15 minutes to cook), I quick-released the steam. Then I added the heavy cream, lemon juice, and cilantro (see the recipe), and switched the IP to slow cook (venting valve on “venting,” not “sealing”), for 30 minutes, just as the slow cooker recipe directs.

It came out…PERFECT.  If anything, it was a little better than when I’ve made it in the slow cooker because my chicken didn’t get too dry.  And it took less than an hour to cook instead of 6.5 hours in the slow cooker!

I’m seriously fired up about this, if you can’t tell.  🙂


Baked Potatoes

I’m trying to make sure I don’t fall off the learning curve, so I decided to try another basic item from The First Seven Things article: baked potatoes. I’d made Slow Cooker Crack Chicken over the weekend, partly to get the jump on the week and partly to have a Super Bowl fallback in case my Instant Pot Buffalo Chicken Chili didn’t work out.  I thought the “crack” chicken might be good served over baked potatoes.

Instructions

  1. Scrub the potatoes and prick them all over with a fork.
  2. Put them into the Instant Pot on a steamer basket.
  3. Add 1 c. of water.
  4. Lock and seal the Instant Pot lid.
  5. On Manual setting, set 12-20 min. depending on the size of the potatoes.
  6. If desired, preheat oven to 400 degrees F.
  7. When timer goes off, do a quick release of the steam.
  8. Carefully (with gloves or tongs), remove the potatoes.
  9. Optional: Finish the potatoes (to crisp up the skins) in the oven; rub with olive oil and salt before putting into the oven.  15 minutes in the 400-degree oven.

How It Turned Out

OK. My potatoes were on the medium-to-large side, so I tried them for 16 minutes in the IP, then 15 min. in the oven.  They were slightly undercooked–edible enough to serve, but I would have liked them softer.  Next time I’ll probably set a longer time for the IP, and I might skip the oven step altogether, especially if I’m just using the potatoes as a base for something else.

The “crack” chicken was pretty good, and I still have more to serve on buns or in tortillas as wraps.


My First Meal

Previously on “Dana Tries Pot”

  • I tried unsuccessfully to hard-boil some eggs.
  • I finally figured out how to make the thing turn on and cook something.
  • I am humbled and fully convinced of my need to read instructions (and sometimes to watch Youtube videos).

The Recipe

Since it’s Super Bowl weekend, I wanted to make something for the game tomorrow. Buffalo wings are pretty traditional fare for the Super Bowl, but hubbs doesn’t like wings much. So I found a recipe called Instant Pot Buffalo Chicken Chili and thought that might be both easy and a Super Bowl-ish compromise.

You can see the original recipe in the link, and here’s how I did mine “to taste”:

Ingredients

cooking spray

1 c. carrots, peeled and sliced

1 c. celery, chopped

about 3/4 c. chopped onion

2 cloves minced garlic

1.5 lbs ground chicken

2 15-oz cans diced tomatoes

2 1/2 teaspoons chili powder

1/3 c. hot buffalo wing sauce (I used a bottled brand called Wing Time)

1/2 c plain Greek yogurt

1/3 c goat cheese crumbles (because I hate blue cheese)

chopped chives for garnish

Directions

  1. Spray the inside of the Instant Pot with cooking spray.
  2. Put in the ground chicken and turn the Pot to Saute. Saute with the lid off, stirring, until the chicken is lightly browned.
  3. Add the onion and stir with the chicken for about 2 minutes.
  4. Add the carrots, celery, and garlic and stir. Switch the pot to “keep warm.”
  5. Put the diced tomatoes into a blender. Pulse briefly so that the tomatoes are the consistency of chunky tomato juice. Two cans yields a little over 3 c. of liquid.
  6. Add the tomatoes, chili powder, hot sauce, and garlic to the chicken and vegetable mixture and stir in.
  7. Lock the lid in place and turn the venting valve into sealing position.
  8. Using the Manual button, set the timer for 25 minutes. It will take an extra ten minutes or so for the pot to come to pressure. You will hear steam happening once the pressure cooking begins.
  9. When the timer goes off, release the pressure using quick release. (Turn the venting valve to “venting,” but be careful because hot steam will escape from the lid. I used silicone oven mitts and kept my arms, face, etc. at a safe distance.)  It took maybe 10 minutes for the pressure to release.  Then I turned the pot off (it will default to “keep warm”) because we’re not eating the stuff until tomorrow.
  10. Top with the cheese crumbles mixed into the Greek yogurt, plus chopped chives for garnish.

After 25 minutes, the veggies are tender and the meat appears properly cooked. I tasted it briefly, and it’s HOT. I think we’ll like that Greek yogurt mix-in when the time comes.

finished-chili

So…it’s done. The thing is out of the box, it’s assembled, and it cooked me something!  Hurray!

EDIT: Reheated the chili today using the slow cooker function on the Instant Pot. We ate it during the Super Bowl. It was really good!  My tweaks gave it the right amount of heat, especially with the yogurt/cheese crumbles sauce stirred into individual servings. I thought the amount of liquid was about right, but I could see going with even a bit less, say 2-2 1/2 cups, for a thicker sauce.

I’d eat this again. I like making chili and have a few recipes in my rotation, but I think this one is worthy.